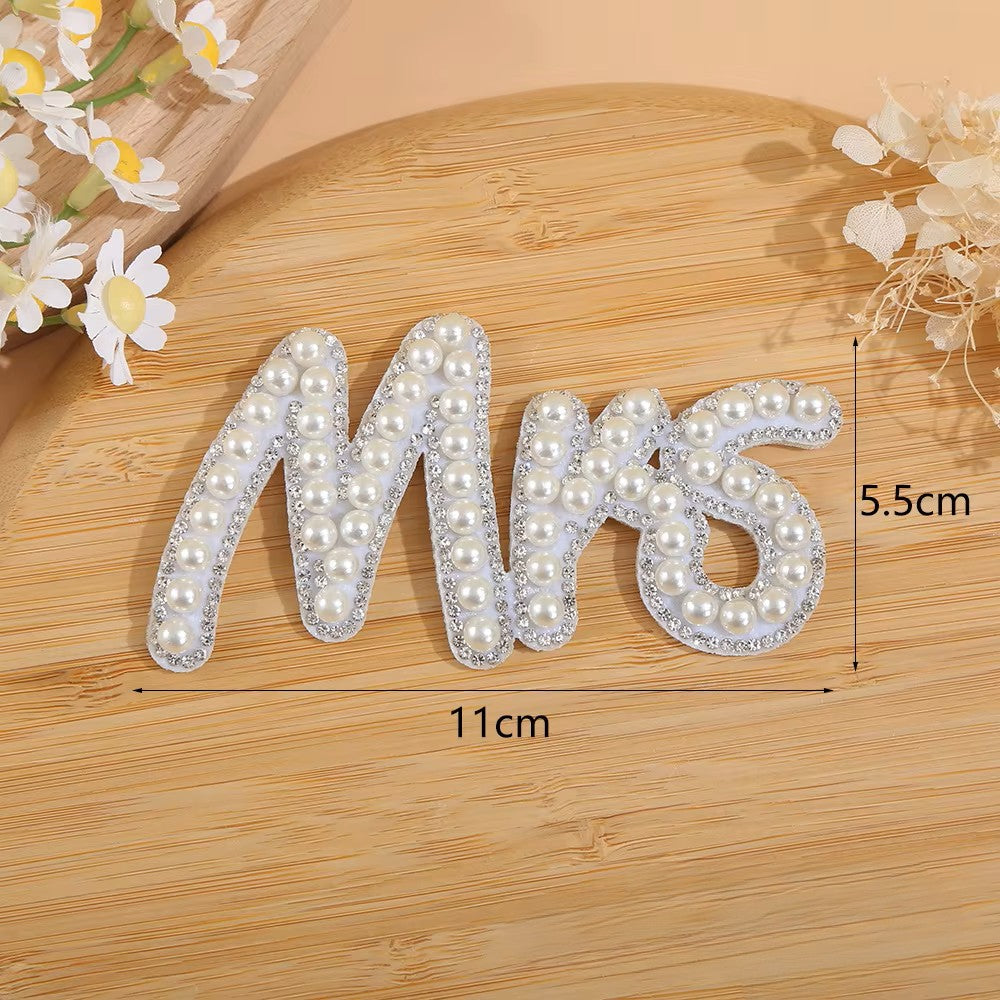
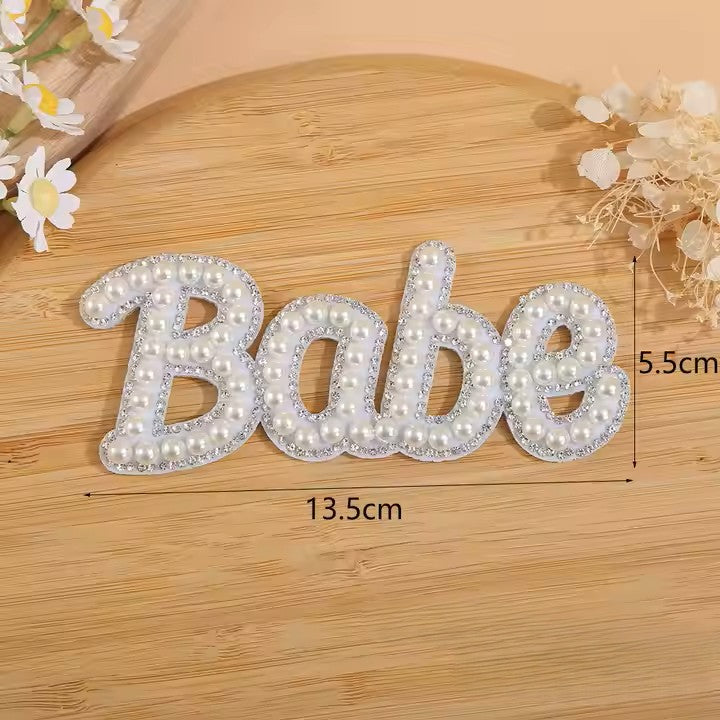
These elegant Pearl Patches are iron-on or self-adhesive patches featuring the words "Bride," "Babe," and "Mrs." delicately crafted with beautiful beaded pearls. Perfect for adding a touch of glamour and personalization to bridal wear, accessories, or party attire. The intricate beadwork gives the patches a sophisticated and timeless look, while the self-adhesive or iron-on backing ensures easy and secure application on a variety of fabrics. Whether you're customizing a bridal robe, sash, or tote, these patches add a chic, personalized statement for the bride-to-be. A must-have for creating memorable, stylish wedding pieces!
To Apply the Self-Adhesive Heart Patch:
Step 1: Prepare the Surface
Ensure the surface where you’ll apply the patch is clean and smooth. Make sure it’s free from any dust, dirt, lint, or moisture for the best adhesion.
Step 2: Peel Off the Backing
Gently peel the protective backing from the adhesive side of the patch, exposing the sticky surface.
Step 3: Position the Patch
Carefully place the patch on your desired area. Once positioned, press it down firmly to ensure that it adheres to the fabric or surface.
Step 4: Apply Pressure
Press the patch firmly for 15–20 seconds to ensure a good bond. You can use your fingers or a flat object to apply even pressure across the patch.
Step 5: Iron for Extra Durability
For a stronger bond, turn the fabric over and gently iron the backside of the patch (without steam) for 15–20 seconds. This step helps the adhesive set and ensures long-lasting attachment.
Step 6: Allow Time to Set
Let the patch sit for a few minutes before using or wearing the item to ensure the adhesive has fully set and bonded.
To Iron-on a Patch:
Step 1: Prepare the Patch Area
Ensure the patch area is free from any debris, such as hairs, lint, or dirt.
Step 2: Select the Appropriate Fabric
Assess the fabric type of the item you plan to attach the patch to. For delicate materials like leather or heat-sensitive synthetics, opt for a sew-on patch instead.
Step 3: Set Your Iron
Prepare a dry iron (without steam) to avoid damaging the fabric or patch.
Step 4: Attach the Patch
Position the patch on the fabric, covering it with a piece of fabric or parchment paper. Gently press the iron onto the patch, starting from the center and using the tip of the iron for precision.
Step 5: Flip the Fabric
Turn the fabric over and repeat the same ironing process on the back side of the patch to ensure a secure bond.
Step 6: Allow Time to Bond
Let the patch cool for 5-10 minutes, allowing the adhesive to fully bond with the fabric.
Step 7: Verify the Attachment
Once the patch has cooled, lift the fabric gently to check if the patch is securely adhered. If it’s not fully attached, repeat the ironing process until the patch is firmly in place.